Regístrese ahora para una mejor cotización personalizada!


You just need a Raspberry Pi, a touchscreen display, and a screwdriver.
Adrian Kingsley-Hughes/You probably know already how versatile Raspberry Pi computers are.But it's not until you add a display that you really get to experience the true power and flexibility of this platform.
Check out which companies are dominating the kit market.
Read nowAnd not any old display, but a touchscreen display.
Here's what you need to do build a touchscreen computer using a Raspberry Pi.
First, you need aRaspberry Pi . That's easier said than done given that they're in short supply, but shop around and you'll probably find one (here's 's advice on where to buy the Raspberry Pi 4 and alternatives).
If you have an older Raspberry Pi 3 lying about, you can use that with this display.
Also: These are my 3 must-have Raspberry Pi accessories
Here's mine -it's an 8GB Raspberry Pi 4 B.
Raspberry Pi 4.
Adrian Kingsley-Hughes/Then you need a display.
There are a number of displays out there, but the one that I'm using here is theofficial Raspberry Pi 7-inch 800 x 480-pixel touchscreen .
That, plus a Phillips-head screwdriver, is the minimum you need, but I've gone a bit further here and added a case as well.
The case helps protect the Raspberry Pi and the display from damage, and makes it feel like a proper computer as opposed to a homebrew project.
Now that you have all the parts you need, here's the process for adding the touchscreen display to your Raspberry Pi.
Fitting the display is pretty easy, but the first bit is also the fiddly bit because it involves using tiny ribbon cable.
To attach the ribbon cable to the connector on the display, first find the display connector. There's a little gray plastic tab on this connector that has to be slid back to allow the ribbon cable to be fitted. Push the ribbon cable as far as it will go and then press the gray tab back into place to secure the ribbon cable.
Also: I just solved one of my biggest Raspberry Pi headaches
The ribbon cable in my kit had a blue side, and the instructions said to have this side facing toward the circuit board. Your ribbon cable might be different, so check your instructions.
Connecting the ribbon cable to the display controller.
Adrian Kingsley-Hughes/Next, fit the Raspberry Pi to the board, attaching it with the four screws.
Make sure not to overtighten these screws.
Attaching the Raspberry Pi to the display board.
Adrian Kingsley-Hughes/Now you'll connect the four jumper wires to the display's control board. It doesn't matter which color you connect where, but you need to know which is which because you'll need to connect them to the appropriate pin on the Raspberry Pi in a little bit.
For reference, here are the four connections on the display board, along with which pin on the Raspberry Pi they need to be connected to:
How do you know which pin is which on the Raspberry Pi?
Looking at the Raspberry Pi board with the writing in the correct orientation, with the 40-pin connector at the top (called a GPIO, which stands for general-purpose input/output), pin 1 is on the bottom left, and pin 40 is top right.
Jumper wires attach here on the display controller
Adrian Kingsley-Hughes/Jumper wires that supply power to the display.
Adrian Kingsley-Hughes/Remember that ribbon cable you connected to the display controller?
Now's a good time to connect the other end to the Raspberry Pi. The process is the same as for connecting it to the display controller.
Connecting the other end of the ribbon cable.
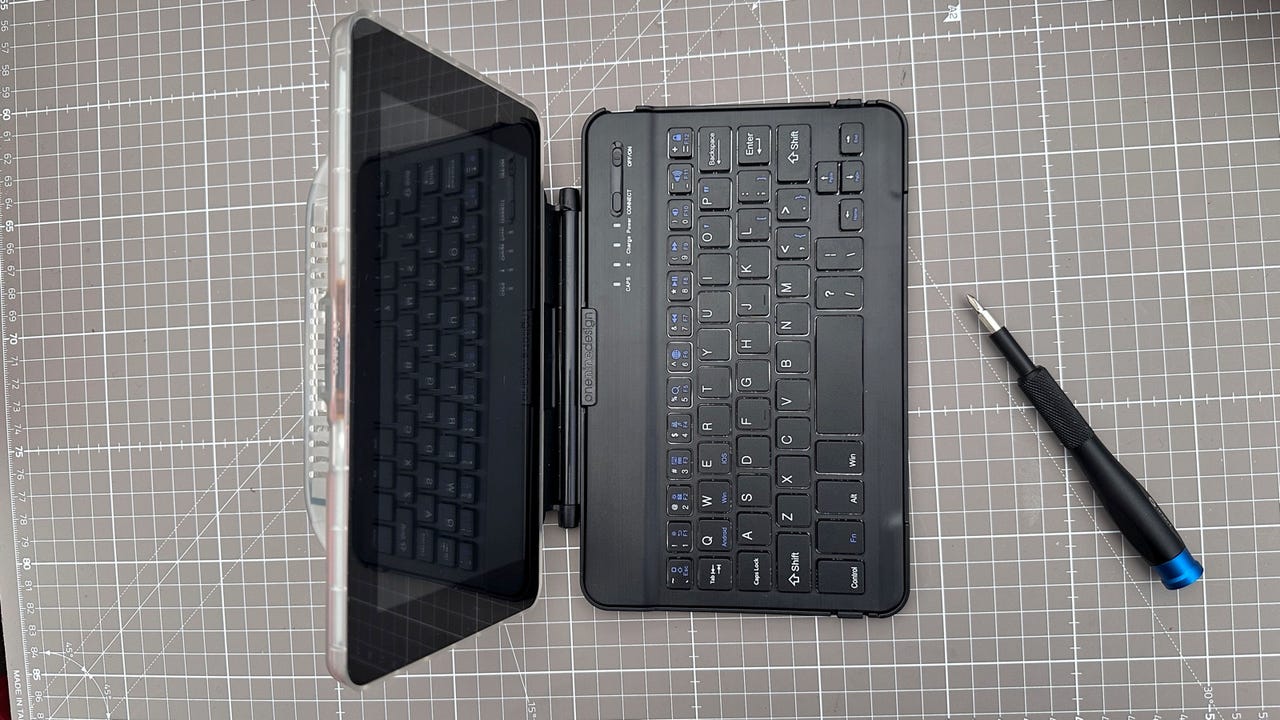
Adrian Kingsley-Hughes/Next, you can pop the whole assembly into the case. When it's in place correctly, the ports will line up with the cutouts.
I found it took a bit of fiddling to get the display into the case properly, but everything seemed to fall into place once the screws were fitted. (Again, you do not need to overtighten these screws.)
Putting everything into the case.
Adrian Kingsley-Hughes/How it looks when everything lines up.
Adrian Kingsley-Hughes/You've added a touchscreen display to your Raspberry Pi! Fire it up and update the software, and you're ready to take your Raspberry Pi projects to the next level.
 Etiquetas calientes:
tecnología
Nuestro proceso
computación
Etiquetas calientes:
tecnología
Nuestro proceso
computación
Regístrepor correo electrónico ahora para acciones semanales de promoción
100% free, Unsubscribe any time!
Add 1: Room 605 6/F FA YUEN Commercial Building, 75-77 FA YUEN Street, Mongkok KL, HongKong Add 2: Room 405, Building E, MeiDu Building, Gong Shu District, Hangzhou City, Zhejiang Province, China
Whatsapp/Tel: +8618057156223 Tel: 0086 571 86729517 Tel en Hong Kong: 00852 66181601
Correo electrónico: [email protected]
 English
 Pусский
 Français
 Español
 Português